Shutterbug RSS Feed
New Member
One post-processing technique that has surged in popularity among landscape photographers is the so called "Orton Effect." Sometimes it's overdone, but when applied correctly you'll love the creative, dreamy look that you achieve.
What's different about this tutorial from Lachlan Garutti (AKA Locki Gee) is that he demonstrates how to quickly create an impressive Orton Effect in Lightroom, rather than using the more common Photoshop approach. He explains everything you need to know in less than six minutes, after which you'll want to update your everyday image-editing workflow accordingly.
Australia-born Garutti is so committed to his craft that he currently resides in a van with his cameras while traveling throughout Europe. He specializes in nature, adventure and travel photography and is very fond of imbuing images with an eye-catching glow. It's a straightforward five-step process than anyone can master in minutes, and Garutti explains how to save the effect as a preset for future use.

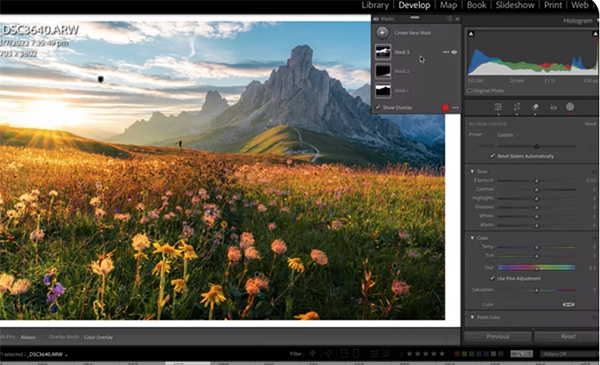
Garutti's goal is to add an Orton Glow to the highlight areas in today's demonstration photo. It's a beautiful alpine scene in the Dolomite mountains that's nicely composed but the light isn't quite right. So watch the magical transformation that occurs when he applies a soft, warm, comforting glow.
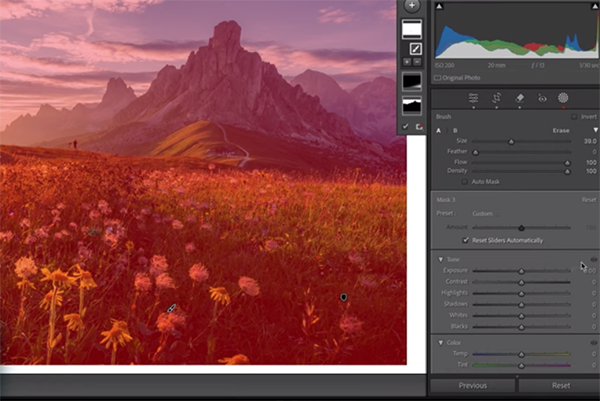
The first step is somewhat unusual and involves covering the entire image with a single mask. There are a variety of ways to make this selection and Garutti demonstrates why the Brush tool approach is preferable to others for this particular task. He also explains the most appropriate settings which include a Brush size of 100%, lowering the Feather to zero, and cranking up Flow and Density to 100%.
Now it's time to add a signature glow that makes the Orton Effect so popular. You'll learn how to set overall exposure, highlights, and contrast. Garutti explains that, "we don't want to blow out the entirety of the image, we just want them to glow with no clipping in the whites." By doing this you can achieve a subtle brightness that doesn't overwhelm the shot.

At this point the image looks pretty great, but there are three more important steps that refine the effect for a spectacular result, so be sure to hang in there until the end. Then pay a visit to Garutti's instructional YouTube channel where you'll find more shooting and image-editing lessons.
We also recommend watching a tutorial we featured recently with another Adobe expert who clarifies the difference between Lightroom's "two most important color-grading tools" and demonstrates when and how one works better than the other.
Continue reading...
What's different about this tutorial from Lachlan Garutti (AKA Locki Gee) is that he demonstrates how to quickly create an impressive Orton Effect in Lightroom, rather than using the more common Photoshop approach. He explains everything you need to know in less than six minutes, after which you'll want to update your everyday image-editing workflow accordingly.
Australia-born Garutti is so committed to his craft that he currently resides in a van with his cameras while traveling throughout Europe. He specializes in nature, adventure and travel photography and is very fond of imbuing images with an eye-catching glow. It's a straightforward five-step process than anyone can master in minutes, and Garutti explains how to save the effect as a preset for future use.

Garutti's goal is to add an Orton Glow to the highlight areas in today's demonstration photo. It's a beautiful alpine scene in the Dolomite mountains that's nicely composed but the light isn't quite right. So watch the magical transformation that occurs when he applies a soft, warm, comforting glow.
The first step is somewhat unusual and involves covering the entire image with a single mask. There are a variety of ways to make this selection and Garutti demonstrates why the Brush tool approach is preferable to others for this particular task. He also explains the most appropriate settings which include a Brush size of 100%, lowering the Feather to zero, and cranking up Flow and Density to 100%.
Now it's time to add a signature glow that makes the Orton Effect so popular. You'll learn how to set overall exposure, highlights, and contrast. Garutti explains that, "we don't want to blow out the entirety of the image, we just want them to glow with no clipping in the whites." By doing this you can achieve a subtle brightness that doesn't overwhelm the shot.

At this point the image looks pretty great, but there are three more important steps that refine the effect for a spectacular result, so be sure to hang in there until the end. Then pay a visit to Garutti's instructional YouTube channel where you'll find more shooting and image-editing lessons.
We also recommend watching a tutorial we featured recently with another Adobe expert who clarifies the difference between Lightroom's "two most important color-grading tools" and demonstrates when and how one works better than the other.
Continue reading...
